What Is an AI Outfit Changer, and Why Are Stores Switching to It?
An AI outfit changer takes 1 photo of a real garment and puts it on a person: a generated model for your catalog, or a shopper's own photo for a try-on preview. For a store, the catalog use matters most, because it replaces a model shoot with 12 credits an image.
Key facts
- On Fluxx.work, dressing an AI model in your garment costs 12 credits an image: ₹67.86 on the ₹475 Starter pack, falling to ₹37.82 on the ₹24,999 Agency pack.
- A virtual try-on preview, which puts the garment on a specific person's photo, costs 20 credits: 8 more than a catalog image.
- The input is 1 clear photo of the garment alone: a flat lay, a mannequin shot or a hanger photo all work if the garment is pressed and evenly lit.
- Studio model shoots start at $95 per image at Squareshot, and Soona lists full-body models from $159 an hour (checked October 2026).
- 4K output costs the same 12 credits as 1K, and failed generations are refunded to your balance.
What an outfit changer actually does
An outfit changer is not a text prompt that invents clothes. It starts from a photo of a garment that exists, works out its shape, seams, print and colour, and then renders that same garment on a body in a new pose, with folds and shadows that follow the body underneath. The difference matters for selling. A general image generator asked for a red linen shirt will draw a red linen shirt, but not yours, which is why prompting chat tools rarely works for catalogs, as covered in why ChatGPT and Gemini fail at clothing photos. An outfit changer is judged on one thing: whether the garment in the output is the garment you ship.
Catalog images and try-on previews are different jobs
The same technique serves two audiences. For the store, it produces catalog images: your garment on a model chosen to suit your brand, in front, back and three-quarter poses, on the background each marketplace wants. For the shopper, it produces a try-on preview: the garment on a photo of themselves, so they can judge colour against their skin and length against their height. Most stores need the first before the second, because a try-on button does nothing for a product page that still has only a flat lay. The trade-offs between the two are covered in virtual try-on vs. AI models.
Why it is becoming the default for e-commerce apparel
Three costs drive the switch. The first is the model shoot itself: booking talent, a studio, hair and makeup, and a stylist for a day, then waiting for edits. The second is the sample problem: every new style has to be produced, shipped to the studio and steamed before it can be photographed, so listings go live weeks after stock arrives. The third is refresh cost. A traditional shoot is fixed once it is done, while an outfit changer can redo a product for a new season, a new market or a new model in minutes. Stores that sell many styles in short runs, where a model shoot per style never paid off, gain the most.
What it gets wrong, and how to check before publishing
Outfit changers fail in predictable places. Small logos drift or blur, repeating prints lose their spacing at the seams, and sheer, sequinned or heavily embroidered fabric is simplified (the reasons are explained in why AI struggles with sequins, chiffon and embroidery). Length and fit can also shift: a cropped top that renders at the waist misleads the buyer. Review every image at full size next to the real garment, and check colour, print, logo, length, neckline and buttons. The garment-fidelity checklist lists the 10 checks that catch most problems before a customer does.
Is it allowed on marketplaces?
Marketplaces judge the image, not the method. Their rules ask that the product is shown accurately, that the main image meets the background and framing rules (pure white with the product filling about 85% of the frame on Amazon), and that nothing in the photo misrepresents what the buyer will receive. An AI on-model image of your real garment can meet all of that; an image that changes the garment's colour or cut cannot, however it was made. Platform-by-platform positions are collected in are AI product photos allowed.
| Job | What you upload | What you get | Credits |
|---|---|---|---|
| Catalog on-model image | 1 photo of the garment | The garment worn by a generated model, ready for the listing | 12 per image |
| Same model, next garment | The garment plus a model you have already used | A consistent face and body across the whole collection | 12 per image |
| Virtual try-on preview | The garment plus a photo of a person | That person wearing the garment | 20 per try-on |
See the Difference
Drag the slider to compare: before your upload, after Fluxx.
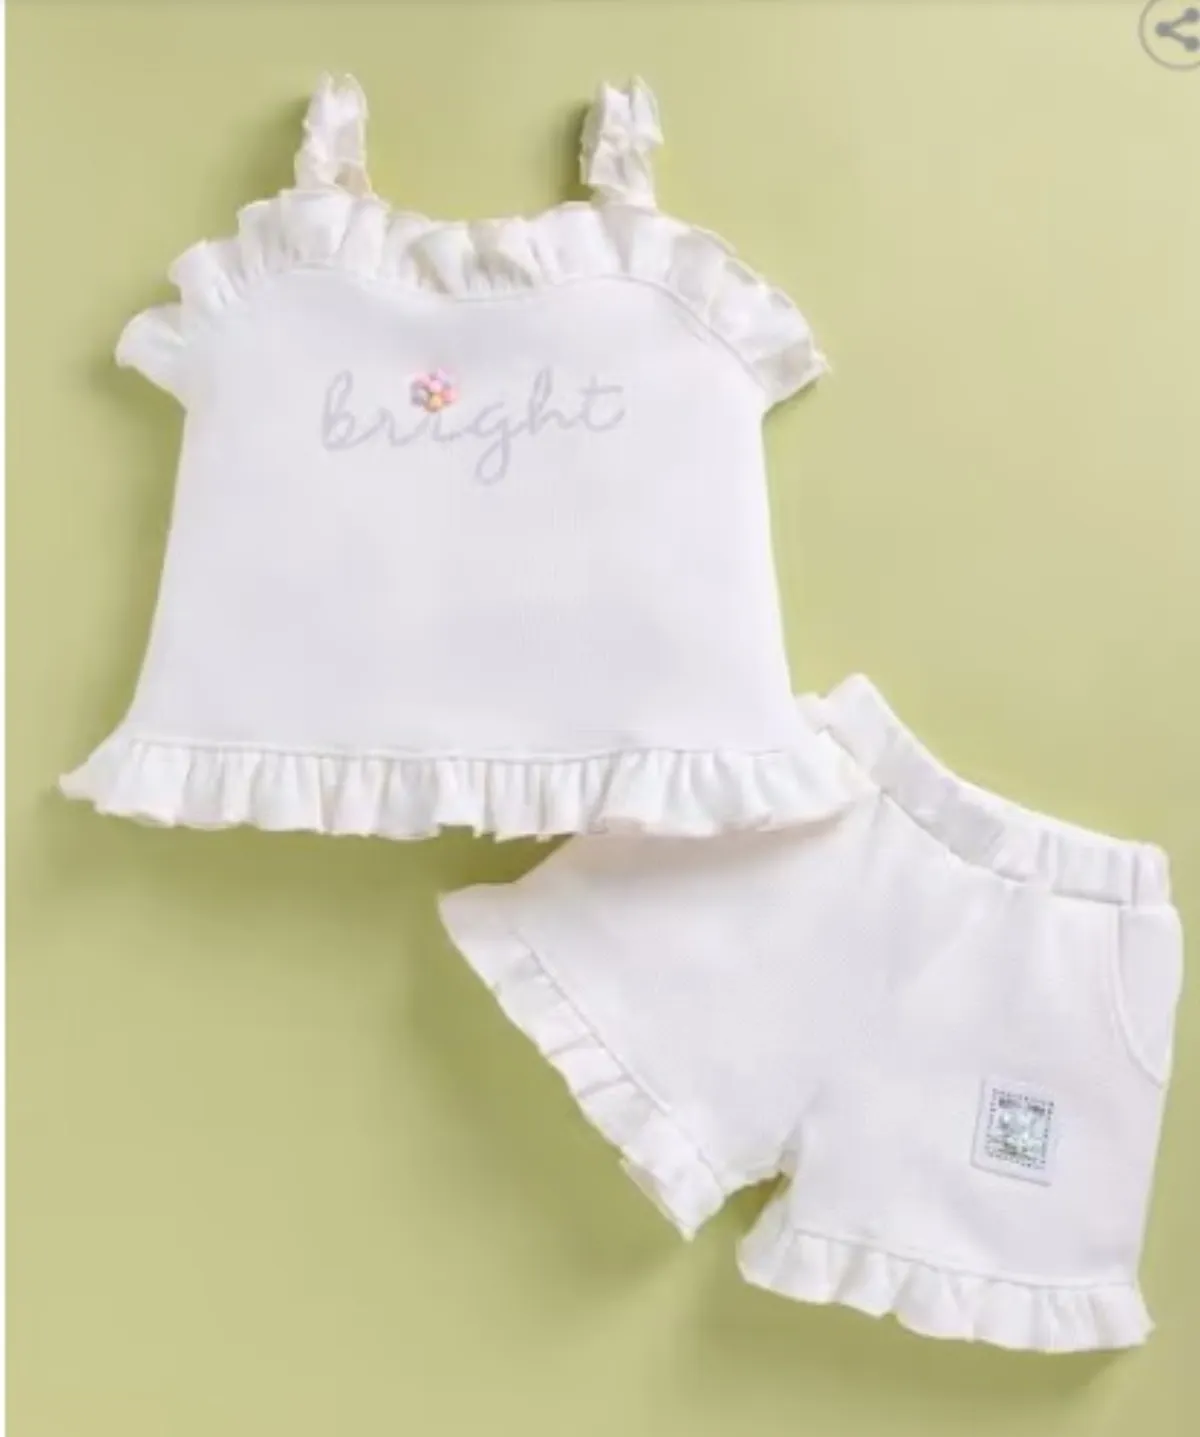
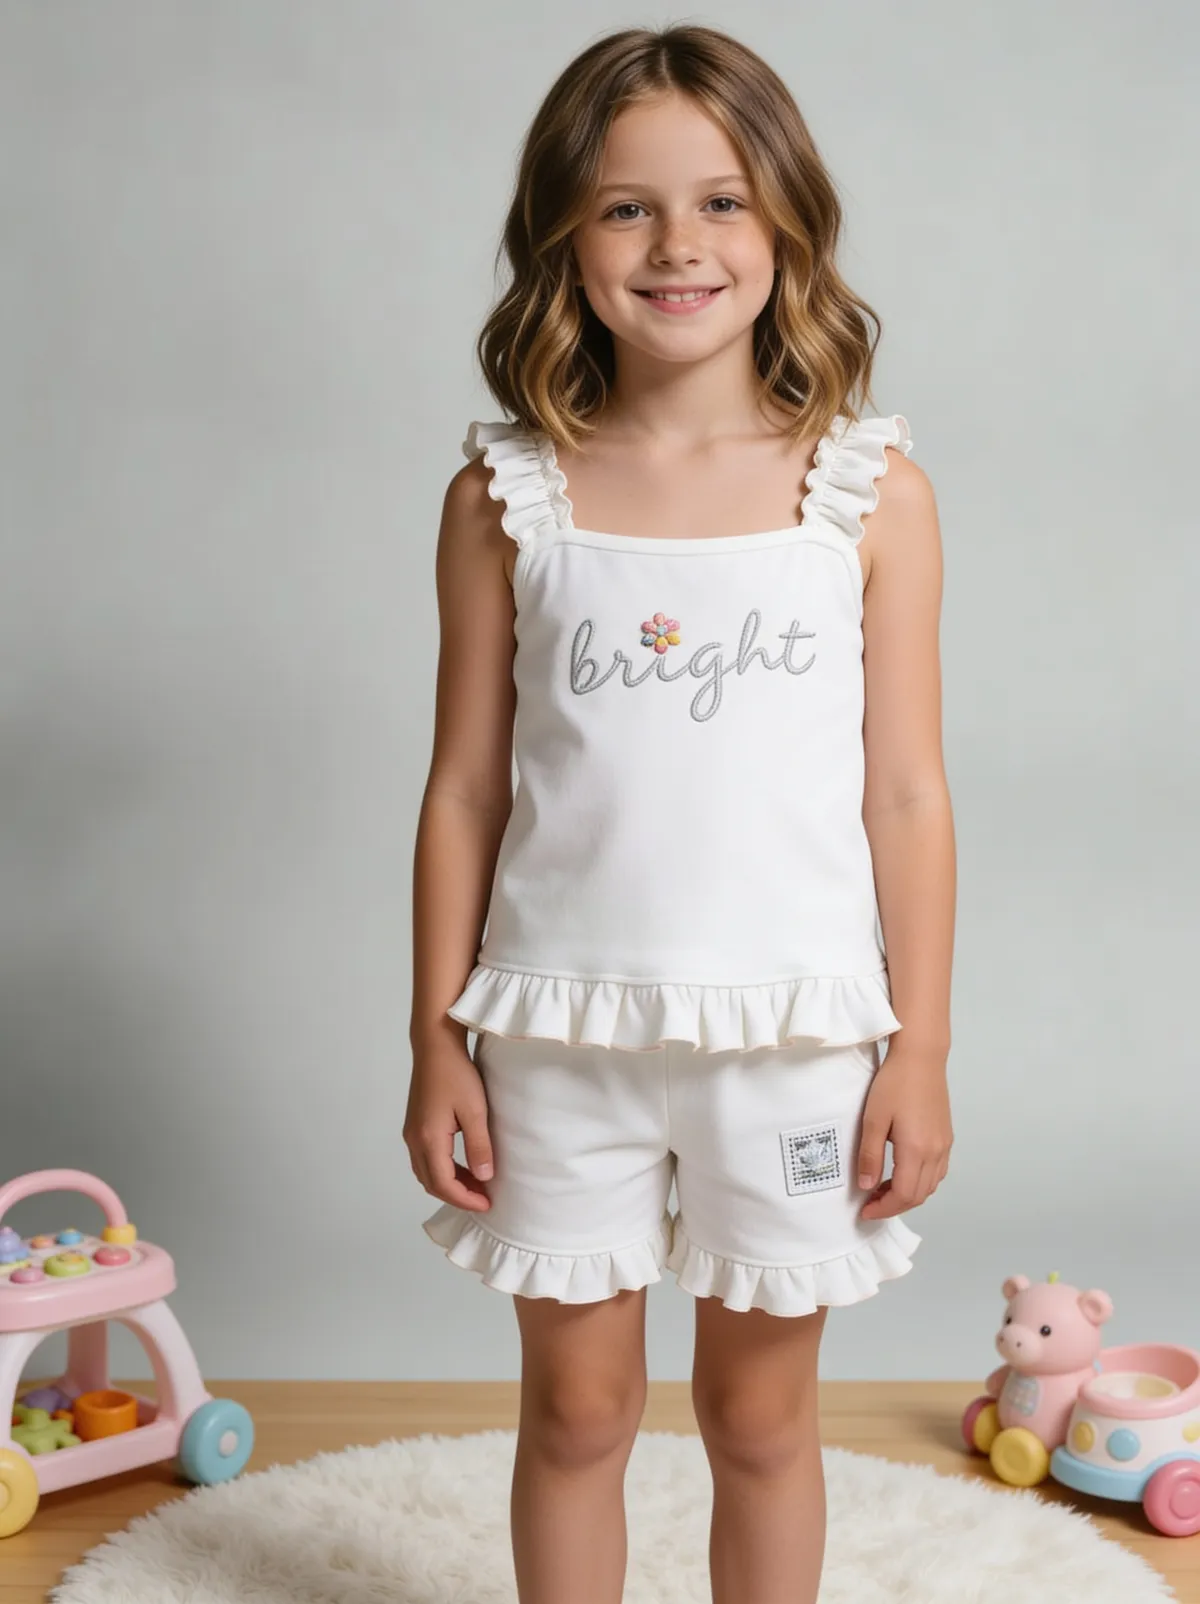 BeforeAfter
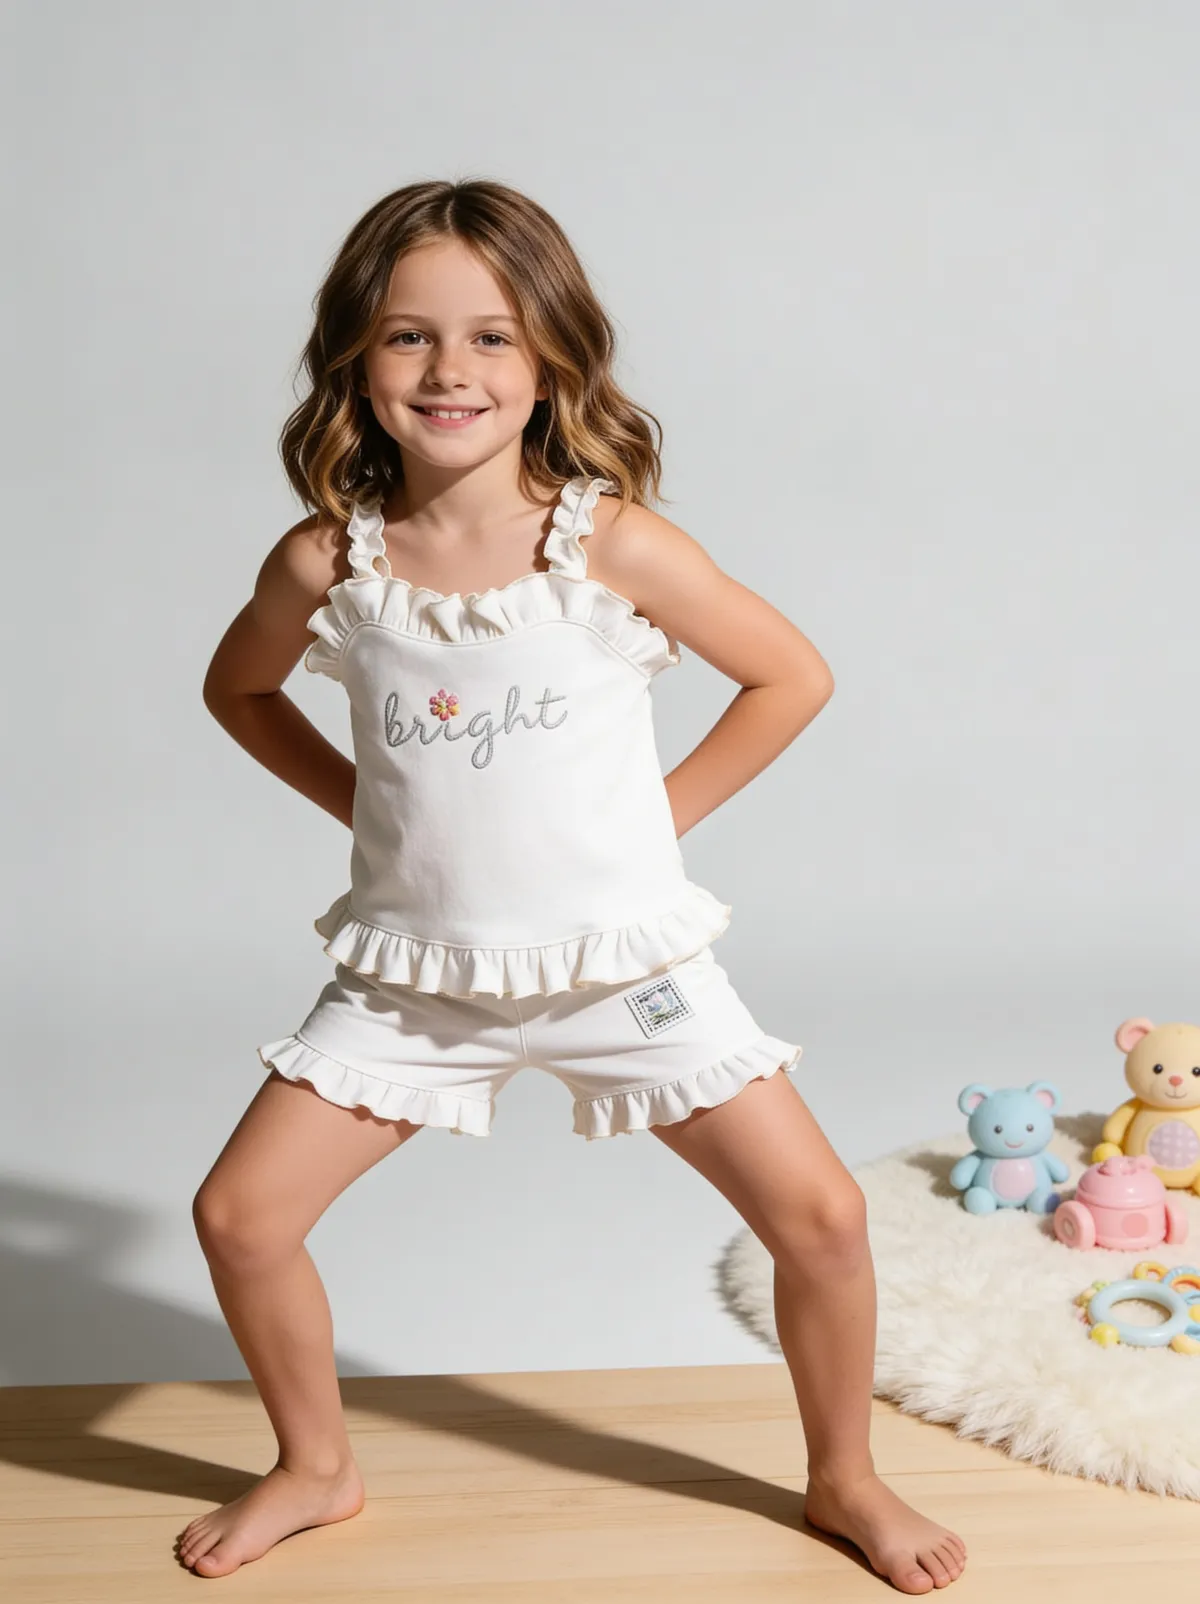 BeforeAfter
Benefits
On-model images for every style without booking a model
Listings that go live when stock arrives, not weeks after
Seasonal and regional refreshes without reshooting
How It Works
1
Photograph the garment once: flat lay, mannequin or hanger.
2
Choose a model, pose and background for the listing.
3
Generate the on-model images and compare them with the real garment.
4
Export at each marketplace's size and upload.
Best Practices
- check_circleShoot the source garment pressed, straight on and in even light
- check_circleKeep the same generated model across a collection
- check_circleCheck every output at full size before uploading
Common Mistakes
- cancelUsing a creased or tilted garment photo as the source
- cancelPublishing without checking print, logo and length against the real garment
- cancelAdding a try-on button before the catalog has on-model images
Brands that shoot with Fluxx






“With ChatGPT and Gemini, I often had to keep tweaking prompts and regenerating images to get the look I wanted. With Fluxx.work, apparel try-on is much more streamlined. I can create on-model images in different styles without the endless reprompting, saving both time and effort.”
Prerna
Toonyport
“A photoshoot is never just the photos. There's the studio, the photographer, models, props and all the coordination. Fluxx.work lets me create product visuals without arranging all of that for every creative, so I can try more ideas and keep my marketing budget in check.”
Deepak
We Are Unproven
“As a small business, I can't have a designer on hand for every requirement. Fluxx.work lets me create product visuals myself, with no complicated production setup, so I spend less time on creatives and more on running the business.”
Aakash
Mr. Mop
“In an online store, product images are the first thing customers notice. Starting from photos I already have, Fluxx.work gives me clean product shots and lifestyle visuals for every marketing need, without booking a new shoot for each idea.”
Arihant
Wishkey
Frequently Asked Questions
Does an AI outfit changer keep my garment's exact print and logo?
It should, but check: print spacing, logo detail and colour are the 3 things most often altered. Compare each output at full size with the real garment; on Fluxx.work, QA verification adds 12 credits per image to check this for you.
What kind of photo should I upload to an AI outfit changer?
1 sharp, evenly lit photo of the garment on its own, as a flat lay, on a mannequin or on a hanger. Steam it first and shoot it straight on, because creases and tilted angles carry into the result.
Is an AI outfit changer the same thing as a virtual try-on?
They share the technique but serve different people. A catalog outfit changer puts your garment on a generated model (12 credits on Fluxx.work); virtual try-on puts it on a shopper's own photo (20 credits).
How much does it cost to put a whole catalog on AI models?
At 12 credits an image, 50 products with 3 on-model images each is 150 images and 1,800 credits, which fits inside the ₹9,999 Business pack (238 images at ₹42.01 each).
Why Fluxx.work
Fluxx.work puts your real garment on a consistent AI model from 1 photo at 12 credits an image, with try-on previews at 20 credits from the same balance.