How to use Fluxx
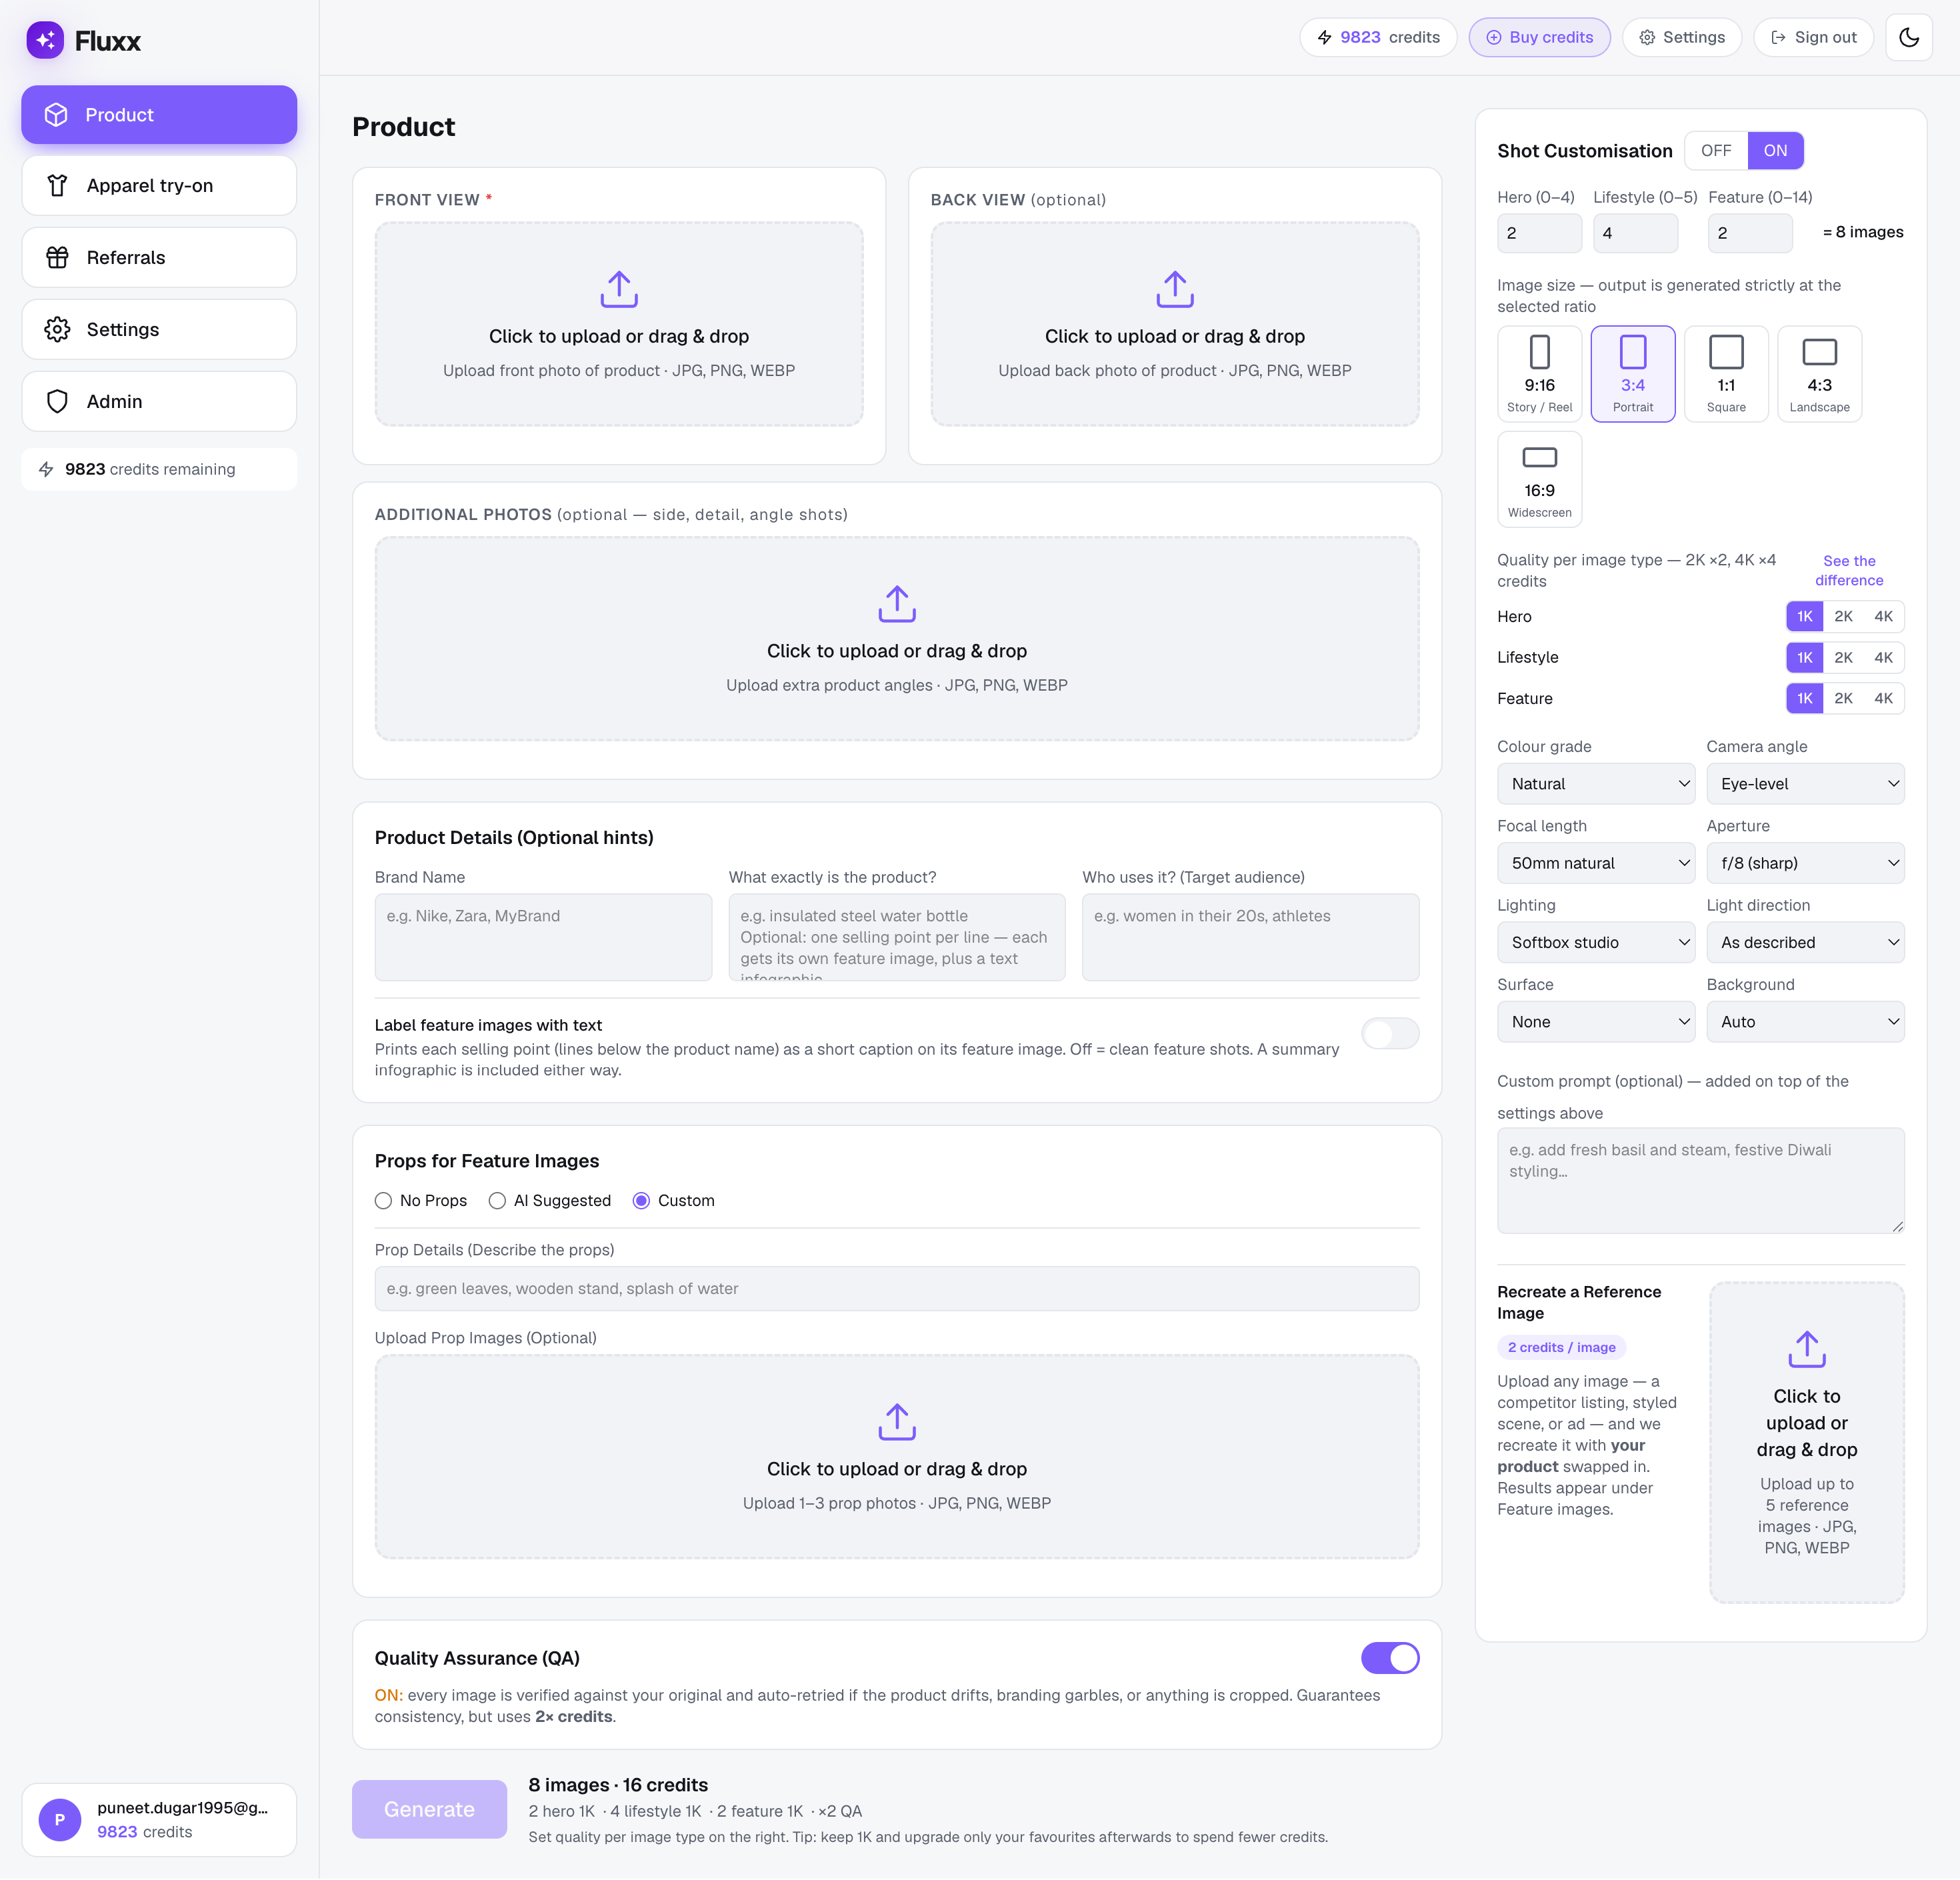
Upload one product photo and get studio-grade hero, lifestyle, feature, and try-on images — your product stays pixel-perfect while we build the scene around it. Here's every feature, with a quick clip of each.
Quick start
- 1Sign up — New accounts include 5 free credits — no card needed.
- 2Pick a mode — Product for any physical product, or Apparel try-on for clothing worn on an AI model.
- 3Upload your photo — Add the front view (required); back and detail angles improve fidelity.
- 4Add optional hints — Brand, “What exactly is the product?”, and target audience sharpen the results.
- 5Choose counts, size & quality — How many Hero / Lifestyle / Feature images, the aspect ratio, and 1K / 2K / 4K per type.
- 6Turn on QA (optional) — Guarantees the product stays consistent — uses 2× credits.
- 7Generate — Images stream in. Download the winners, or upgrade individual ones to 2K / 4K.
Every feature, explained — tap to jump & play
1. Props for feature images
Props are the objects and surfaces styled around your product — they add context without touching the product itself.
- No Props — clean, product-only studio shots.
- AI Suggested — Fluxx picks brand-appropriate props automatically.
- Custom — describe props in text and/or upload reference photos of them.
2. Custom prompt
Under Shot Customisation → ON, layer any styling instruction on top of the automatic settings — mood, season, extra elements — in plain English.
e.g. "warm festive styling with soft fairy lights" or "dark background, warm bokeh, premium editorial". Your product stays identical — the prompt only styles the scene.
3. Recreate a reference image
Upload any image you like — a competitor listing, a styled scene, an ad — and Fluxx recreates that exact composition and mood with your product swapped in. The original product never appears; only yours does.
Costs 2 credits per image; results appear under Feature.
4. Label feature images with text
Enter selling points (one per line) in "What exactly is the product?", and turn this toggle on to print each point as a short caption on its feature image — a ready-to-post listing graphic. A summary infographic is included either way.
5. One upload → a full set
Every generation returns Hero (clean studio), Lifestyle (in use), and Feature (macro close-ups). Real examples for two products:
6. Resolution — 1K, 2K, 4K
Set quality per image type, or generate at 1K and upgrade only the winners. The credit total updates live: 1K = 1×, 2K = 2×, 4K = 4×.
7. QA — guaranteed consistency
Turn QA on and every image is checked against your original and auto-retried if the product drifts. Uses 2× credits, guarantees the product stays true.
8. Credits at a glance
Failed images are refunded automatically. New accounts include 5 free credits. See full pricing →